Showing posts with label design. Show all posts

Monday, 30 May 2016

How to edge a river bank to protect and shore your garden from erosion

One of the mixed blessings of living in the Netherlands is the large amounts of water. You are never more that than a stone's throw away from a canal or river or ditch, and it's almost inevitable (if you live outside the major towns) that you will end up with water running near your property. In our case, we are bounded on 4 sides by drainage canals that form a small part of a complex drainage system that keeps this below sea-level corner of the Netherlands dry. It brings joy with an ever present procession of wildlife - we have ducks, moorhens, swans. coots, kingfishers and herons all within a few steps outside our door.

However with the constantly moving water, and the annual commitment to dredging out of the canal to ensure silt doesn't build up, erosion is a real and present problem. Around the fields, it's easy to see that the waterways have widened significantly over the years. Around the house, the banks are managed on one side by a line of mature lime trees, who's roots have bound up the soil tightly and act as a natural edging. At the front however, you can see the remnants of the old 'beschoeing' or river edging with a few rotten spikes intermittently sticking up about a foot or more away from the bank. When W had to mess around in the water to put the new gates in, he found out the hard way that whilst the main canal is shoulder deep, the old edging has slowed erosion sufficiently that there is an underwater bank that is only knee high deep. Sadly we weren't quick enough with a camera to capture the experience - and with forewarning, no-one else seems sold on the idea of recreating it.

We decided that we wanted to replace the front edging for two reasons - one, to stop the erosion and stabilize the banks and secondly to limit the amount of damage the resident muskrats are doing to our front lawn. Muskrats are avid tunnelers and leave as comprehensive a set of networks as your average mole - but significantly larger in diameter. These regularly collapse, scenting the air with a tempting aroma that no self respecting Great Dane can ignore - triggering some mad digging by one of the most efficient canine-destruction machines you've ever seen : a GD puppy on the hunt!

Lots of research later we decided that doing it the old fashioned way - by hand - would be the way to go and that we felt confident to do it ourselves with lots of help from the lads. We followed plans from http://www.bakkerdehouthandel.nl/ and had all of the materials delivered from them. (All credit for the graphics are bakkerdehouthandel and we recommend getting materials from them - they have an easy onsite calculator to work out exactly how much you need!).

The process consists of sinking poles into the basal mud layer. Each pole needs to be 2/3rd sunk, and 1/3 boarding to shore up the edging. The gap between each pole is a maximum of 50 cms apart as illustrated in this diagram

Optie Palen

You then attach boards horizontally along the poles to provide at least one board height above the waterlevel and boards all the way down through the water to the base level of the river. The boards go on the inside of the poles so that the soil pressure pushes them against the supports.
Optie Planken
The boards are attached using bolts to the main poles and a horizontal bracing bar is applied on the outside ( waterside) of the poles to prevent warping and to give additional support for the land anchors.

Optie Gording

Finally you attach anchors into the soil to ensure that the boards & poles have support and don't slide outwards over time. You add a layer of plastic to stop the soil from filtering through the cracks on the inside (land) of the boarding, and you back fill the gap between where you are boarding and where your bank actually is with large amounts of soil. Let it settle, stomp it down, repeat the filling until the ground reaches the level you want. Finally top off the poles with a flat board to give you a more presentable front and an edge to sit on.

Optie Afdeklat


Looks easy, doesn't it? So....no issues, right? Well here's how it *really* went!

The first task was to measure up and plan how much wood and boarding we would need, Whilst nominally this isn't a terribly hard task, given the clear instructions from deBakker, it's surprisingly hard to measure in a straight line, and to balance on a narrow muddy edge when there is a Great Dane  who thinks that the sole reason you are in the canal is to play ball with him. Luca spent most of the afternoon pointedly dropping his ball in the canal and nudging it away into the middle of the canal whilst staring pointedly at poor W - who was freezing, grouchy and not happy with his childhood flashbacks of retrieving balls from water!

Once the wood order and the crew had assembled the next challenge was how to assemble and put together the frame. W & team quickly decided after advice from our neighbor F that the way to go was to assemble lots of individual panels on dry land, to attach the large flat boards on to the main poles and to sink each panel as a block into the muddy base. They then chose to attach the reinforcing strip once the panels were in place and to do the same with the mud guard plastic and the anchors.

The first panel made it quite clear just how TOUGH a good hardwood is - and you definitely don't want to be using softwoods underwater. Within the first 3 hours, we had burnt out 3 drill bits and burned out the motor on a deWalt rechargeable drill. Knots and just the sheer number of holes needed made this an incredibly tough activity. Note to the wise : you want to drill slowly and steadily, not at max power, and take time to clear the drill bit of sawdust regularly.
Eventually the team got into a good steady rhythm that allowed consistent progress, without destroying machines & tools. All the movable woodworking tables that W has made over the last few months came into their own and we were able to use them outside in the sunshine to get maximum throughput Here's the assembly line in progress!

With the first panel done, the team decided to try placing it immediately to work out what the challenges were ahead. The dream team grabbed the first panel- with all of their proposed boards attached to it and headed out to the water to start sinking it into the riverbed. They very quickly realized that a) its remarkably hard to hammer 5 poles in simultaneously  and b) when you screw up on the location, and have to move it sideways, it's REALLY hard to pull it back out of the mud to re-position it! We learned a valuable lesson early on : be willing to improvise a little on measurement - sometimes although the letter of the law calls for 5 boards, reality of the river bank only allows 4! We also learned that the action of hammering the poles caused the tops to split and crack quite a lot. Luckily we had purchased extra long poles, so by moving the board placement further down, we gave ourselves a much longer level of pole at the top, that we could cut off later on with a reciprocating saw. Easier to hammer, and less traumatic when you splinter off chunks!

After first day creating panels, it was back to the task of placing them in the river on the second day. Unfortunately the remnants of the old 'beschoeiing' rapidly proved to be a problem, with the old collapsed frame getting in the way of the new poles. Electric tools and water don't really mix very well, so we had to revert to good old fashion hand tools and my trusty bow saw for tree surgery got called into action. Luckily the weather was on our side with glorious hot & sunny days making up for the fact that water was glacially cold and very very very murky! Each footstep through the mud released methane from the decaying plant materials making the whole exercise particularly fragrant!

At the end of the third day we'd completed fitting the right hand side of the bank and discovered some of the challenges we had created for ourselves with sinking the gate posts into the water. It wasn't too much of a problem to the right of the gate as it was not far overhung, but on the left we had to do a long diagonal slice around the fencing and come up with new creative ideas to stop Luca from traversing out to freedom.

 The dream team also came up with interesting ideas on how to balance out across the water, in order to keep momentum and power behind their sledgehammer strokes when the bank and boarding had significantly parted company. It gave us inspiration for a later innovation : the cat scramble board or duck boards - to help animals which don't want to remain in the water to get safely out. As both Lumikki and Jesper had fallen into the canals within days of being allowed out to roam, I want to be sure that the wooden edging doesn't have fatal results when one of them misjudges their steps.


Once all the boards were in, it was time to attach the plastic material that stops the soil from trickling away. This is done on the inside, along the line of the main retaining baton. Once attached,the main retaining strip put in,and the ground anchors attached, it was time to start to long hard graft of back-filling the soil gap. Luca had decided early on that it was HIS fort, and that he was the king of the castle! It gave him a perfect location to supervise the work that everyone was doing and to provide his own personal commentary to the proceedings!

Once back-filled, we took a few days off to let the soil settle, and to find out if we'd missed any sneaky corners where the soil was trickling away. This seems to be an inevitable part of the process, and we were lucky to only have one 'leak'. Once settled it was top up time then we needed to remove the top extension of the pole down at the board height and to attach the flat board over the top to finish it off. Whilst initially the boarding looks really 'wonky' - wavering all over the place with no real straight lines in place - once the retaining bar and the top was laid on, it was amazing how much the movement disappeared. From the far side of the river, it looks beautiful and smooth with a gentle curve that mirrors the shape of the land.


5 days of hard work later (plus a few waiting days ) and we ended up with a beautiful new canal edge. The observant among you will have spotted the extra special add on that we made -  I'll talk more about in a later post - a fishing boardwalk!


Wednesday, 17 February 2016

Fabric design in a mudroom


After finishing the curtains for the craft room, I have started work on the mudroom curtains. I have 2 windows and a door in the mudroom to cover - and the mudroom door is a huge heat loss area. This is despite having put draft sealant around it and all the work we did with insulation during the rebuild. As the paint colors are inspired by the same design see as  as the craft room, I was hoping to use the same fabric. Thwarted  by fate apparently - it's limited edition and the fabric shop had sold out. There weren't many options in terms of fabric and I took a punt on a blue 1970's style diamond design. It's a reversible pattern with one side in shades of  blue and  one in shades of grey - and completely Austin Powers and swinging 60's London - Yeah Baby!


Lots of fun sewing - with Livia now deciding to attack the iron and ironing board instead of the sewing machine. I'm not really happy with the end results though (even less happy with the photo - it is impossible to get an image without massive amounts of white out). My blogs are normally happy blogs of success but I think this one is really a blog of 'must try harder'. I've run out of fabric before I got the third window done, but even so , I don't think I was going to win even with a full fabric haul.  The colors just don't work  at all in the room. They might blend with the paint colors, but they really don't work with the old tiles on the floor. They also don't work with the pine wood work - although that might change when the doors are on and I whitewash the wood. 
I am also not happy with the look of the window/door combination . I've been spending time trying to work out why not - and the only thing I can think of is that it's something to do with fact they are both on the same hanger rail. The rail is quite close to the top of the window and the door - but that's the way I have always hung curtains in the past, and it's never been a problem before. In this room, however, it really truncates the room - and the curtains look squat and ugly. I think I might raise the curtain pole to closer to the ceiling so that the curtains have a longer fall before I try my next attempt. What do you guys think? Help needed here,  I think!

Sunday, 7 February 2016

Renovating the Mudroom : build phase 1


When we first stepped into this house, our first impression of the house's interior was the mudroom. It was a dark and scruffy room.   and smelled faintly of damp. The walls had random pipes and industrial style ventilation tubing which crisscrossed over the whole room. The only light came from a tiny side window and the glass upper door. We knew this room needed to be radically changed - but I don't think we realised just how much we would need to do to make it a beautiful room.


There was a strange velvet flocked brick pattern wallpaper which was peeling away - and appeared to be held onto the walls by dint of many tin-tacks in the corners of kid's paintings that were pinned to the walls. One side of the room was lined with old kitchen cabinets for storage of paints and random stuff . This was the third kitchen in the house - definitely well equipped on the kitchen front! On the opposite side of the room, an old doorway had been partially bricked up, but poorly done so that it was only flat on the other side, leaving a strange dip in the wall in the room.

Wall paper stripping can be quite soul destroying - but I always find it interesting to see the history of the house emerge - different paper layers, and different colors of paint, as you strip away the paper. It's almost a consolation for the hours you have to spend steaming and stripping stubborn patches of wallpaper, in order to prepare for your new colors. At some point in time, some previous owners had a love for candy pink walls with a dark burgundy lower trim in a hard gloss. It makes a dark and small room even smaller and darker - and definitely doesn't match the yellow and green wooden trim of the doors! At least the gloss paint helped with the removal of the wallpaper, but on the pink surfaces it was so thoroughly glued that we had to scrape inch by inch.

Preparation continued on all sides - we also ripped out the old kitchen units, and then started to knock out the shape of a new window next to the entrance door. The plan was to build a window frame and insert a double glazed window pane into the double barn doors that form the front of the room. Nothing ever goes smoothly though - and as we started to cut, we quickly realized that the wall/barn doors had not been properly secured as it started to collapse. IDD to the rescue : he had the team quickly refocused on replacing and re-pinning structural framework and supporting the floor above. Once it was all repaired, we could continue with our window work  and replacing and increasing the insulation in the wall. As the hole emerged it made the most amazing difference to the light in the room - definitely one of the best decisions we could have made!

Once we'd stripped all the paper and  all the preparation work was complete, it was clear that the walls were too damaged to redecorate without re-skinning with plaster - and D is a plaster guru. He corralled a team and the lads started to re-plaster the whole room. This last summer was gloriously warm and sunny  : both a blessing and a curse when you are doing so much work. Hard for the workers as it's hot, heavy, hard work, but good for drying out the plaster. That's a double edged sword as it dries so fast it's hard to finish smoothly, but D took it in his stride. A few tips we learned as we went along : if you are mixing a lot of plaster, having a mixing paddle with a power motor is a must. There are lots of different grades of plaster and they are not completely interchangeable. We also used a metal corner brace to shape the corners of the room - it's lovely for a while, but a Great Dane can knock the thin plaster layer off in seconds!

Plastering done, we started the clean up - and discovered that plaster gets EVERYWHERE. It's really nasty stuff for spreading all over the house, and we learned the hard way that you can't just hoover it up. It's so fine that it goes straight through all the filters you have on your hoover, unless it's an industrial grade builders hoover , coats the engine and the electrics, and burns it out. We were not planning on replacing our Dyson hoover, but after it died halfway through the build , we had to! The tiles on the floor are quite old, uneven and full of nooks and crannies that the plaster can hide in  - mopping just seemed to push the plaster around. At some point in the future I plan to replace them and to level the floor which is incredibly wobbly and uneven, but not just yet, so we had to get them clean. We hired a circular sanding machine  with a bristle brush attachment and used that to break through the majority of the plaster dust, but in the end, nothing beats getting down on hands and knees with a scrubbing brush and good old elbow grease!


After so much work just to reach blank canvas stage, painting seemed quick and easy - although incredibly expensive in paint. The fresh plaster drank the paint like a desert drinks rain - and we had to do multiple coats to get the color even and streak-free. I have always like coastal themed homes and this Design seed inspiration picture set the tone for the direction I wanted the room to have. I didn't find an exact match - but I chose a white with a hint of blue - and a light blue accent wall for this room.  The woodwork was all repainted in a light neutral shade that complimented the wall colour.
I had spent quite a lot of time on Pinterest in the run-up to the work session, and had a good idea of the type of furniture I wanted in the room - and this picture gives the closest idea of what I wanted to achieve.I want to be able hide away the jumble of daily life that collects in your entrance way in deep cupboards - and still to be able to hang coats, scarves and dog leads in a convenient and easy location. With so much land, it's also essential to be able to remove boots and muddy shoes quickly, before continuing into the rest of the house. It's called  a mudroom for a reason. It was also going to be the room where Luca slept and stayed when the house is empty. Of course, like all best laid plans, I'm a complete softie, and Luca gets to go where ever he wants, whenever he wants! With the inspiration images to hand, IDD & D spent a couple of evenings drawing out plans and designing what we could best fit into the space.

Once the plaster was dry, IDD got to work gluing and cutting a lovely pine board to build the basic frame of the furniture. I intend to whitewash the pine to give it a hint of white - but as we haven't yet completed the doors and the trim, it's still on the to-do list. Roll on Phase 2! We ended up with a shelved cupboard and two deep wardrobes for coats and winter clothes. We have a comfy seat along one wall that you can sit on whilst you change shoes, backed  with a set of high open hooks for wet coats and accessories to dry on, before being put away in the cupboard.

Like all the best plans, we ran out of time before we managed to get the doors fitted and W has been fully occupied on so many other things that we still have an open set up in the mudroom. I can't wait to get the doors and trim done, so that I can paint and finish the room, but I think I will need to be patient until it's warm enough to work outdoors again. There's a lot of gluing and cutting to be done to achieve it and the stable block where we do most of our DIY work set up has no heating. It's still a lot better than it was  and like every entrance, is full of miscellaneous items that mysteriously migrate there when you are not locking. We even have a small dog table for Luca to drink his water from - as a Great Dane, he is prone to bloat, and needs to have his food and water elevated to a comfortable height.


Sunday, 31 January 2016

Sewing 101 : How to make curtains


January has been very slow for doing more work on the house, with a mix of work-tiredness and just january blues making me very slothful and disinclined to do much more than curl up and chill with what little free time I have. This weekend has been the first time that I seem to have found that extra gear and stepped back up to the house renovation work again.

With cold winter weather and an old, poorly insulated house, putting up curtain rails was a real priority back in December. We have a range of old & secondhand curtains that didn't go with the decor which got called into use as soon as the rods were mounted to block the cold cascading from windows and doors. None of them match the decor very well, and all of them are mismatched and variable in terms of size & attachment type(hooks, hoops, rings etc.). Curtain are incredibly easy to make and very expensive to have made to your own design/style choice so I decided to find a fabric store and make my own. I hope that by the end of this blog, you will feel comfortable doing the same.

So what do you need ?

A sewing machine or a passion for handsewing.

I have an ancient Toyota sewing machine which I bought in 1993. It is incredibly basic and simple, but refuses to keel over and die, and sews pretty much every fabric I ask it to, leather included. . I keep eyeing up the lovely new machines with embroidery setting and all sorts of fancy stitching, but I can't justify the expenditure given that this machine does everything I need. For curtains, you really only need a single straight stitch setting.

Some fabric.

Choose your fabric based on what you want as the primary effect. I chose a thick linen striped fabric with lots of weight to keep the cold out, but for light summer use, a fine cotton or even a gauze is enough. Think about machine washability, particularly for areas like kitchens where the curtains can collect a lot of dirt. If it is machine washable, it's recommended to wash and iron the fabric before you get going.

To decide the length of the curtain, measure the height from the curtain rod to the point you want the curtains to finish, and add extra for hems. I usually do a 1 inch wide hem all around, with the fabric turned over twice. I  leave the base hemming until after the curtains have been hung for the first time , then pin in situ and remove to hem on the machine. I also leave a little extra for shrinkage after washing, after a few months. It's always easier to move hems, than to start from scratch again.

The width is dependent on what sort of attachment or header you chose. The average width calculation is between 1.5  to 3 times the distance you want the curtain to cover. Pencil pleat is the most common style with a general fabric guidance of 1.8 times the width.

Depending on the width of your fabric you may have to join multiple sheets together - if you have a repeating pattern or a pattern that needs to be linked up properly, make sure you have enough extra  fabric to be able to do it.

Header tape.

The header tape is used to form the gathers at the top of the curtain. In the Netherlands there is a basic tape which is used with hooks to create different widths of gathers. I personally prefer the tape that has threads running through it to pull to shape, and the hooks are solely for suspension. There are a wide range of styles, ranging from pencil, to single/double/triple pleated, to goblet style. You need as much tape as the width of the fabric.

Sharp scissors.
Thread to match your fabric
Pins
Iron & Ironing board
Measuring tape.

Once you have all your materials, it's time to measure up and start cutting. I can't recommend enough measuring at least twice before you start to chop into your fabric. I tend to triple check, panic about my base measurements, revisit, measure again and then cut. It's better than getting it wrong and having to buy new fabric. At this point, make sure you have your iron and ironing board on standby and ready.

I usually start by fitting together sufficient fabric lengths to make the width needed, pinning and sewing. Although I've been told that if you pin horizontally you can sew over the pins, I tend to pin vertically, and remove them on approach as I sew. I've had more than one needle hit a pin and break the tip off - and I have no wish to be hit by flying shards of metal. Once you've sown the first vertical seam, iron down the seam, separating the two edges to opposite sides. I then pin the two side hems - I usually fold over twice to ensure that there are no fraying edges visible, with each fold being a fingers width wide. After pinning, I always iron - it makes it a piece of cake to sew. The hem at the top, I usually make a bit deeper - closer to two inches to give some weight and form to the pleats - and something solid to attach the header tape to, as it holds the full weight of the curtains. Once all the side hems are done, the top hemmed and header tape attached, it's a case of hanging the curtains and pinning up the bottom hem. I often let them hang for a couple of days to 'settle' into their favoured shape, but it's not really necessary. If the fabric is really light, I'll sew a weight into the corners of the base to keep the curtains from flying around too much in the winds.


This time around, I had lots of company in my sewing journey - Livia decided that she'd give me a helping hand. She finally fell asleep in the middle of the curtain, which truncated the sewing bee for a while.It's finally all done and I'm super happy with the results : it has given the room a real boost of energy and brings together the blue tones in the room.


This post is shared at
Creativity Unleashed Link Party

Sunday, 13 December 2015

Curb Appeal : building new wooden gates part 3


The gates are up ! It's been a long busy week but I think I can claim that we are (nearly) there. We ran out of the stain, so have a few boards that still need painting, but the gates are up, functioning, and dog proof. I know I should wait until everything is completely done, but.......well, I just have to share because the whole lot is gorgeous!

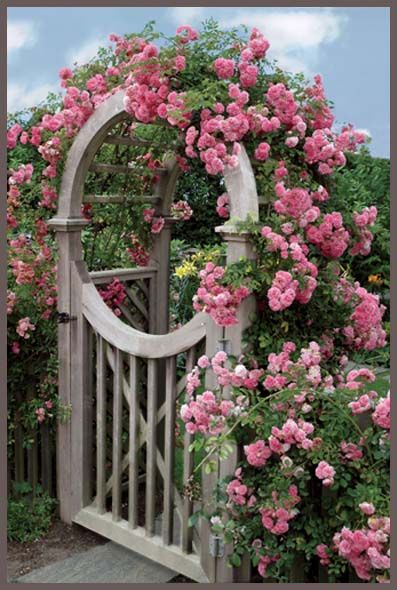
The boys worked super hard on getting the front gates done over the last three days. The design was quite challenging as I wanted a rose arbour as well as a curved top to the gate, whilst still carrying through the design theme of diamonds.  We used a design pattern from Remodelaholic  for a garden arbor. They designed it for their vegetable garden to grow climbers like cucumbers, but I want it for roses and jasmine.We had to work the sizes a little to fit in the space - we have a canal bridge we have to fit next to.

The first job was to get the frame up. The ground was so soft that the hole drilling was a piece of cake - leaving a lovely layer of basal clay all over the walkway between the road and the house. Of course, when clay is wet, it sticks to your shoes like glue and the whole area turns into a muddy icerink - making life that much harder! It also made it quite hard to keep the fame completely straight and square which lead to some interesting challenges later with the trellis work.

From the frame, the boys turned their attention to the fencing : more poles to go in, and in this case at least one had to go into the canal. To do that, W had to get his neoprene waders on and 'get wet' in December. Luca was really not happy about this situation, so he kept watch from the bank and barked instructions and 'stay safe!' demands. Apparently a few quick lessons were learned : the left side is deeper than the right, but both are quite a drop, so 'jumping in' is not always the best way to get started! I can't say how glad I am that Luca doesn't like water - it makes life so much easier. I keep wondering about teaching him to swim, and then I think about the cost of fencing off the whole property and decide that he can wait a little while longer. He has already tried as a younger puppy, and has no problems getting across and out - he just hates the cold water with a passion.


From there, it was a case of hanging the gate, fitting the ironmongery and mounting the rose trellises. This is the point where they had another nasty shock - because of the soft ground the trellis was square - but the space wasn't! Some quick rework required to make it a better fit.  Once complete, we then rented a concrete cutter and sliced out the concrete posts of the old gate. It was so tired, it collapsed like butter - I'm so glad we got it replaced before Luca tried pushing through it.


Here we go : the final summary!

Inspiration for the front was :


The end result is this :


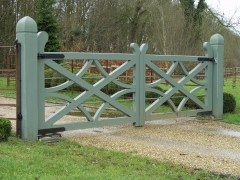
The main driveway gates inspiration was :


The end result (until we dog proof properly!) is : 


Not bad for first attempt if we say so ourselves! What do you guys think?

Some minor painting,, making a base for the new post box and working out how to dog proof the main gates left to do. I'm thinking of trying to 'float' smaller diamonds in the centre of each of the 4 main diamonds. That should hold back the hound. How would you dog proof the diamonds, and still keep the design  looking pretty?