However with the constantly moving water, and the annual commitment to dredging out of the canal to ensure silt doesn't build up, erosion is a real and present problem. Around the fields, it's easy to see that the waterways have widened significantly over the years. Around the house, the banks are managed on one side by a line of mature lime trees, who's roots have bound up the soil tightly and act as a natural edging. At the front however, you can see the remnants of the old 'beschoeing' or river edging with a few rotten spikes intermittently sticking up about a foot or more away from the bank. When W had to mess around in the water to put the new gates in, he found out the hard way that whilst the main canal is shoulder deep, the old edging has slowed erosion sufficiently that there is an underwater bank that is only knee high deep. Sadly we weren't quick enough with a camera to capture the experience - and with forewarning, no-one else seems sold on the idea of recreating it.
We decided that we wanted to replace the front edging for two reasons - one, to stop the erosion and stabilize the banks and secondly to limit the amount of damage the resident muskrats are doing to our front lawn. Muskrats are avid tunnelers and leave as comprehensive a set of networks as your average mole - but significantly larger in diameter. These regularly collapse, scenting the air with a tempting aroma that no self respecting Great Dane can ignore - triggering some mad digging by one of the most efficient canine-destruction machines you've ever seen : a GD puppy on the hunt!
Lots of research later we decided that doing it the old fashioned way - by hand - would be the way to go and that we felt confident to do it ourselves with lots of help from the lads. We followed plans from http://www.bakkerdehouthandel.nl/ and had all of the materials delivered from them. (All credit for the graphics are bakkerdehouthandel and we recommend getting materials from them - they have an easy onsite calculator to work out exactly how much you need!).
The process consists of sinking poles into the basal mud layer. Each pole needs to be 2/3rd sunk, and 1/3 boarding to shore up the edging. The gap between each pole is a maximum of 50 cms apart as illustrated in this diagram

You then attach boards horizontally along the poles to provide at least one board height above the waterlevel and boards all the way down through the water to the base level of the river. The boards go on the inside of the poles so that the soil pressure pushes them against the supports.

The boards are attached using bolts to the main poles and a horizontal bracing bar is applied on the outside ( waterside) of the poles to prevent warping and to give additional support for the land anchors.

Finally you attach anchors into the soil to ensure that the boards & poles have support and don't slide outwards over time. You add a layer of plastic to stop the soil from filtering through the cracks on the inside (land) of the boarding, and you back fill the gap between where you are boarding and where your bank actually is with large amounts of soil. Let it settle, stomp it down, repeat the filling until the ground reaches the level you want. Finally top off the poles with a flat board to give you a more presentable front and an edge to sit on.

Looks easy, doesn't it? So....no issues, right? Well here's how it *really* went!
The first task was to measure up and plan how much wood and boarding we would need, Whilst nominally this isn't a terribly hard task, given the clear instructions from deBakker, it's surprisingly hard to measure in a straight line, and to balance on a narrow muddy edge when there is a Great Dane who thinks that the sole reason you are in the canal is to play ball with him. Luca spent most of the afternoon pointedly dropping his ball in the canal and nudging it away into the middle of the canal whilst staring pointedly at poor W - who was freezing, grouchy and not happy with his childhood flashbacks of retrieving balls from water!
Once the wood order and the crew had assembled the next challenge was how to assemble and put together the frame. W & team quickly decided after advice from our neighbor F that the way to go was to assemble lots of individual panels on dry land, to attach the large flat boards on to the main poles and to sink each panel as a block into the muddy base. They then chose to attach the reinforcing strip once the panels were in place and to do the same with the mud guard plastic and the anchors.

The first panel made it quite clear just how TOUGH a good hardwood is - and you definitely don't want to be using softwoods underwater. Within the first 3 hours, we had burnt out 3 drill bits and burned out the motor on a deWalt rechargeable drill. Knots and just the sheer number of holes needed made this an incredibly tough activity. Note to the wise : you want to drill slowly and steadily, not at max power, and take time to clear the drill bit of sawdust regularly.
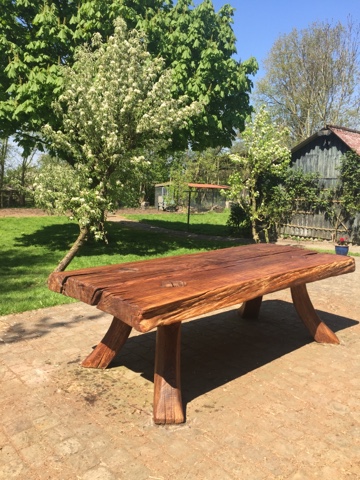
 Eventually the team got into a good steady rhythm that allowed consistent progress, without destroying machines & tools. All the movable woodworking tables that W has made over the last few months came into their own and we were able to use them outside in the sunshine to get maximum throughput Here's the assembly line in progress!
 With the first panel done, the team decided to try placing it immediately to work out what the challenges were ahead. The dream team grabbed the first panel- with all of their proposed boards attached to it and headed out to the water to start sinking it into the riverbed. They very quickly realized that a) its remarkably hard to hammer 5 poles in simultaneously and b) when you screw up on the location, and have to move it sideways, it's REALLY hard to pull it back out of the mud to re-position it! We learned a valuable lesson early on : be willing to improvise a little on measurement - sometimes although the letter of the law calls for 5 boards, reality of the river bank only allows 4! We also learned that the action of hammering the poles caused the tops to split and crack quite a lot. Luckily we had purchased extra long poles, so by moving the board placement further down, we gave ourselves a much longer level of pole at the top, that we could cut off later on with a reciprocating saw. Easier to hammer, and less traumatic when you splinter off chunks!
 After first day creating panels, it was back to the task of placing them in the river on the second day. Unfortunately the remnants of the old 'beschoeiing' rapidly proved to be a problem, with the old collapsed frame getting in the way of the new poles. Electric tools and water don't really mix very well, so we had to revert to good old fashion hand tools and my trusty bow saw for tree surgery got called into action. Luckily the weather was on our side with glorious hot & sunny days making up for the fact that water was glacially cold and very very very murky! Each footstep through the mud released methane from the decaying plant materials making the whole exercise particularly fragrant!
 At the end of the third day we'd completed fitting the right hand side of the bank and discovered some of the challenges we had created for ourselves with sinking the gate posts into the water. It wasn't too much of a problem to the right of the gate as it was not far overhung, but on the left we had to do a long diagonal slice around the fencing and come up with new creative ideas to stop Luca from traversing out to freedom.
 The dream team also came up with interesting ideas on how to balance out across the water, in order to keep momentum and power behind their sledgehammer strokes when the bank and boarding had significantly parted company. It gave us inspiration for a later innovation : the cat scramble board or duck boards - to help animals which don't want to remain in the water to get safely out. As both Lumikki and Jesper had fallen into the canals within days of being allowed out to roam, I want to be sure that the wooden edging doesn't have fatal results when one of them misjudges their steps.
 Once all the boards were in, it was time to attach the plastic material that stops the soil from trickling away. This is done on the inside, along the line of the main retaining baton. Once attached,the main retaining strip put in,and the ground anchors attached, it was time to start to long hard graft of back-filling the soil gap. Luca had decided early on that it was HIS fort, and that he was the king of the castle! It gave him a perfect location to supervise the work that everyone was doing and to provide his own personal commentary to the proceedings!
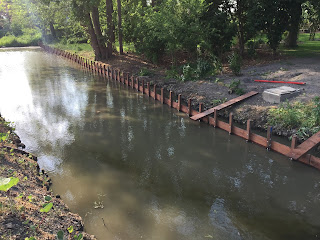
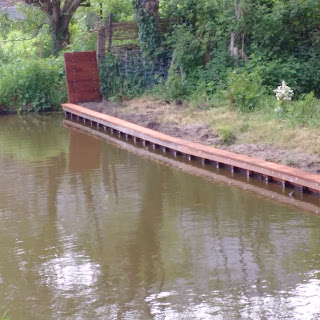
 Once back-filled, we took a few days off to let the soil settle, and to find out if we'd missed any sneaky corners where the soil was trickling away. This seems to be an inevitable part of the process, and we were lucky to only have one 'leak'. Once settled it was top up time then we needed to remove the top extension of the pole down at the board height and to attach the flat board over the top to finish it off. Whilst initially the boarding looks really 'wonky' - wavering all over the place with no real straight lines in place - once the retaining bar and the top was laid on, it was amazing how much the movement disappeared. From the far side of the river, it looks beautiful and smooth with a gentle curve that mirrors the shape of the land.
5 days of hard work later (plus a few waiting days ) and we ended up with a beautiful new canal edge. The observant among you will have spotted the extra special add on that we made - I'll talk more about in a later post - a fishing boardwalk!


