

Its been a busy year - like always! And so busy that from about halfway through the year I ran out of blogging steam. Its cold and crisp and as a result I'm happy to warm up by tapping away ona keyboard again - hopefully this will last a little longer again.
As its nearly 2017 I thought I'd check in on my NYRs and see how I did over the year : 66/106 completed - just over a 60% hit rate!! Like most to-do resolutions some things floated on to the list with urgency - rewiring of lights and switches and central heating repairs - and some things floated off the list in terms of priority or importance : we have decided to delay the work on the top floor for another year, and we decided that a lovely holiday was far more important than a new garden shed and garage!
All in all, there are two resolutions that I'm sad that we missed. One was teaching Luca basic recall - he's still deaf and blind when outdoors and as a result needs to be on the lead at all times. It's still being worked on and hopefully this coming year we will achieve it. The other one I'm sad to miss out on was the quarterly visits to a spa - perhaps I should add that back onto the list for 2017!
How did you do with your 2016 plans?
Clean & stain IKEA patio table, chairs & benchLay tiles in utility cupboard- Replace waterproof silicon edging at back of kitchen sink/kitchen surface
- Grout the tiles under the craft table
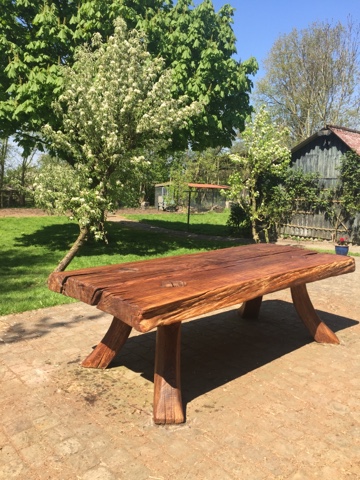
Repair edge of kitchen patioFit draught excluder to mudroomRepair exterior giant table on main patioRepair glue pipe of rear gutter & do extension into grid- Repair garden bench
Fill crack in the wall by back door- Mount curtain poles in the living room
- Make window fillers for the circular windows
- Make window shutters for the circular windows
Lay drainage pipe down to the canal- Clean tiles on roof
Replace top half of rear stable doorFinish floor in the stables cupboard roomStable cupboard room inject DPCNew lights in the stableMudroom doors on the cupboards to be made & hungCraftroom doors on the cupboard to be made & hung- Whitewash wood in craftroom
- Whitewash wood in mudroom
Repair & repaint dog scratches- Build a mud & water catcher tray
Mini diamonds for the gate to stop the dog escapingReplace exterior pole light near houseEat more healthily & take home made food to work at least twice a weekBrick edging for garden bedsSecond coat of paint on the gates & fencesFix the wooden arch base between rose & flower bedMake up a wooden pane and tile the hole in the laundry roomInstall squares on the gate tops at the frontHem curtain in hallGlue harp trimMosaic stones for garden walkwaysHome made curtains for craftroomHome made curtains for mudroom- Finish putting coving around the ground floor :
hall, mudroom,craftroom,bedroom, laundry room. wardrobe, bathroom, kitchen.( only done the living room so far!) "Beschoeing" along the front edge of the garden - timber edging with bespoke vole exits & cat ramps to stop the garden from being washed away by the canal flowLay the garden footpath from gate to kitchen patio, from gate around trees to the boardwalk under the treesMake a fishing boardwalk under the trees!Install anti-leaf devices in the gutters to encourage leaves not to settle in them!Remove the old dog penDrink more water!Level and lay new turf around front & garden side of the house- Finish dining room chair makeovers
New lamp near house, and a new lamp by the gate- Lay matting around the fruit trees
(More) Raspberry frames - make and train raspberries up themMake raised beds for the kitchen gardenGrow a summer feast in the raised beds!- Build the new garden shed & garage
- Finish the Pfaff table upcycle
- Finish the Singer table upcycle
- Repad/stuff Granddad's old chair
- Craft an elf village for the trees
Extend the removal of nettles throughout the garden, as far as the hay barn.- Repair the haybarn
- Gingerbread trim for the conservatory
- Mosaic the postbox base
Accomplish at least 1 upcycling or crafting project per month- Complete design of first floor & above with the architects
Powerwash stablesRepaint all the woodwork on outside of the stables - 'heraldry' on stall shuttersRepaint stable interior- New tiles - mudroom, hall, kitchen (maybe delay until after first floor work?)
Home made Xmas decorations - wood tree- Octagonal bench around the chestnut tree
Wooden flower boxes on the kitchen patioReduce wardrobe clutter by 50% in a journey to a minimal & organised wardrobe life- Standing bar tables made by W in wood
- Move the laundry line & rebuild
- Make a rotating rainshield for laundry line (maybe?)
- Chill out at a spa at least once per quarter!!
- Garden lighting
- Make boot remover
Make giant garden gamesClean blinds in kitchenClean blinds in conservatoryPowerwash all patios & stonework- Re-sand the brick flooring
- Make moss art on the back of the stables
(WT)Fit new garden doors(WT)Re-do bathroom ceiling : replaster, repaint(TZ) re-lay rear patio- Teach the hound to come so that we can run and play on the beach together without a leash
Lay out a chequer board herb garden- Wildflower meadow on the banks of the canal ( opposite side)
- Treat & repair wood in the riding ring
- Treat & repair wood in the starvation paddock
- Clear & relay central walkway between ring & paddock,
De-weed starvation paddock - Zen garden layoutDe-weed riding ring - zen garden layoutClear out stuff in the loft and send at least a car load of stuff off to a better (new) home- Build a clay wood oven for making pizza near the BBQ
Have a giant summer barbeque!Prune old fruit trees- Remove old concrete blocks from the front &
- clear/plant the front area
Get old grain store cleared- Remove asbestos shed ( subject to building new shed)
Level floor in the stables (?new concrete?)Breed ladybirds for the lime treesKeep n do a good job in my day jobRelax, be happy, and garden on!


